***************************************************************************
STEP 4: PREPARING AND SEWING THE TUNIC SKIRT
First of all we need to make the pleats, both on the skirt front and back. Grab the skirt back and determine the middle by folding it in half lengthwise. Place the skirt back on a flat surface, right side up. Mark the middle with a pin. Now pin the notches you transferred from the pattern on either side.

Fold one of the side notches…

…and bring it over to meet the middle of the skirt. (Note to self: Get a manicure!)

Repeat on the other side.

Now baste this pleat in place, 1/4” from the edge. Press this pleat for a nice, crisp look. It will also prevent it from shifting when you attach the skirt to the bodice.

Now grab the skirt front, lay it flat right side up, and repeat this same process. The only difference is that the skirt front has two smaller pleats to the sides. Mark the pleats...

… and baste. Then press.

Place the skirt front and back, right sides together. Pin in place along the sides.

Stitch! It is time to serge/zig-zag your side seams. Do this and then press them towards the back of the skirt. In this case, and because I am short on time today and it’s just a muslin, I skipped this. But you definitely shouldn’t!

Now we’re going to attach the skirt to the bodice. First lay the bodice on the table, turned inside out and upside down. Open it. Then place the skirt, right side out, inside the bodice. Make the side seams match and pin in place.

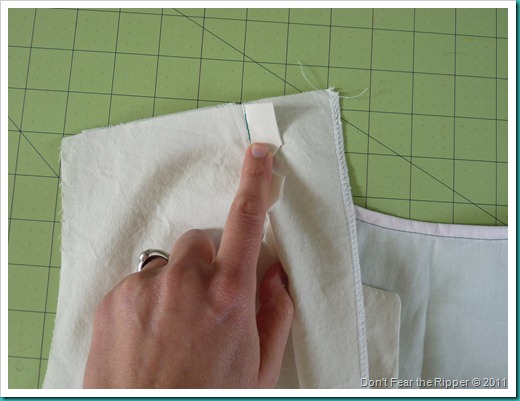
Then pin the bodice and skirt front together. Make the plackets meet and make sure that there is no space between them.

This is what the side seams look like when they come together. Both of them should be oriented towards the back.

Now you’re going to stitch all around. You’re going to start to the left of the left placket and, because this is a stress point, go back and forth on this area 3 or 4 times to reinforce this stitch, then continue sewing all around. Please disregard my horrible stitches. This is just for illustration purposes. Of course you’ll do much better when you work with the final fabric! :-) Now serge or zig-zag this seam to finish it. Press the seam allowance towards the skirt.

It is a good time now to try on your tunic and make sure it fits well. Also, determine how long you want it and make the necessary hem adjustments. If you’re happy with the length, hem the tunic as instructed in step 11. It is super straightforward so I won’t show you how to do it here.
You are done!! Can you believe it? Here is my muslin. The front…

…and the back.

You can see more pictures of some schoolhouse tunics I have made in my flickr pool.
Thank you for sewing along with me! I would love to see your creations. Please leave me a comment if you have any questions. I’ll do my best to answer them! Happy sewing!
Quick links:
Schoolhouse Tunic Tutorial
Schoolhouse Tunic – Part 2
Schoolhouse Tunic – Part 3